How To Stain Your Old Kitchen Cabinets - How To Stain Wood Cabinets How Tos Diy : This provides a better bonding surface for the new stain or paint to adhere to.
byAdmin-
0
How To Stain Your Old Kitchen Cabinets - How To Stain Wood Cabinets How Tos Diy : This provides a better bonding surface for the new stain or paint to adhere to.. Time to stain those ugly oak cabinets! Because let's be honest, i am always looking for the cheapest and easiest way to modernize our home. Wipe off the sanding dust with a clean cloth. Cabinet staining tips applying the stain or varnish with the existing grain of the cabinets results in a more professional look. Apply another coat of the stain remover.
Unless your cabinets are raw wood, the existing finish must be removed before you can apply the new stain coat. Sand all of the surfaces where you plan to apply stain. We found a wide selection of decorative glass at a local stained glass supply store and chose a crossreeded pattern. Use a small piece of painter's tape on the door backs to label their placement; Then, lay your doors flat in a vented area on top of a large drop cloth.
How To Refinish Cabinets Bob Vila from empire-s3-production.bobvila.com Kitchen cabinets cabinets kitchen painting staining start by sanding and conditioning the wood, then stain. You will need to clean off and remove years worth of residue/oils and grime in order to fully prepare the cabinet surface for stain. Old finish, stain, or paint needs to be removed before you can add a fresh coat of stain. Choose a stain color that complements your existing decor. So, the first step in how to stain kitchen cabinets is to remove all the doors, as well as the hardware. Once dry, remove the last of the paint with sandpaper. If you're looking to give your kitchen a major makeover while sticking to a small budget, refinishing your kitchen cabinets could be the best place to start. If your repainting project is just a facelift for the cabinets, you don't need to sand and paint the inside of the cabinets;
The first step in applying stain to kitchen cabinet doors is the preparation.
Gel stain is super thick so you don't even need a primer. We found a wide selection of decorative glass at a local stained glass supply store and chose a crossreeded pattern. There are two ways to go about it. The first step in applying stain to kitchen cabinet doors is the preparation. Jennifer ott january 11, 1970. Apply another coat of the stain remover. So if you want to keep existing cabinets, molding and trim, then updating with paint or stain is your best bet. This provides a better bonding surface for the new stain or paint to adhere to. Once dry, remove the last of the paint with sandpaper. Apply gel stripper with a paintbrush to one or two cabinet/door sets at a time (any more and the gel will dry out). Wipe off the sanding dust with a clean cloth. We have never used actual stain, only gel stain to help update cabinets and old pieces of furniture. Time to stain those ugly oak cabinets!
For exclusive content, visit www.decorsauce.coma full tutorial for beginners on how to update a bathroom cabinet with general finishes gel stain. If you have stubborn black stains left by hardware, apply oxalic acid (available at hardware stores) with a cotton swab (follow manufacturer's directions). Kitchen cabinets cabinets kitchen painting staining start by sanding and conditioning the wood, then stain. Now it was time to apply the stain. Use a small piece of painter's tape on the door backs to label their placement;
Restaining Kitchen Cabinets Pictures Options Tips Ideas Hgtv from hgtvhome.sndimg.com Let the gel sit for 10 minutes or so until you see that the surface has bubbled and softened. Ensuring you've properly prepped and primed your cabinets is essential to ensure you're happy with the stain application and finish. Jennifer's work has been featured in many print and online publications. Then, lay your doors flat in a vented area on top of a large drop cloth. So, the first step in how to stain kitchen cabinets is to remove all the doors, as well as the hardware. Sand all of the surfaces where you plan to apply stain. Gel stain is super thick so you don't even need a primer. Use the sandpaper to sand down the surface of the cupboards to remove the original stain.
The total cost of the cabinet renewal, not including the bin pulls and knobs, was less than half the cost of standard new cabinets.
The shelf resembles a shallow drawer that glides out for easy access to items stored in the back of the cabinet. Apply another coat of the stain remover. The higher the contrast between the stain and base, the more vintage the look of your cabinet. If the color is honey or caramel in tone, use a medium or dark stain. Use a small piece of painter's tape on the door backs to label their placement; Use the sandpaper to sand down the surface of the cupboards to remove the original stain. You will need to clean off and remove years worth of residue/oils and grime in order to fully prepare the cabinet surface for stain. Gel stain is super thick so you don't even need a primer. For exclusive content, visit www.decorsauce.coma full tutorial for beginners on how to update a bathroom cabinet with general finishes gel stain. Let the gel sit for 10 minutes or so until you see that the surface has bubbled and softened. Jennifer ott january 11, 1970. Wipe off the sanding dust with a clean cloth. Use either the paintbrush or old cloths to apply the remover to the cupboards, depending on the manufacturer's instructions.
Jennifer ott january 11, 1970. Cabinet staining tips applying the stain or varnish with the existing grain of the cabinets results in a more professional look. The total cost of the cabinet renewal, not including the bin pulls and knobs, was less than half the cost of standard new cabinets. We have never used actual stain, only gel stain to help update cabinets and old pieces of furniture. One quart was enough to do our master bathroom and the 2nd small bathroom as well.
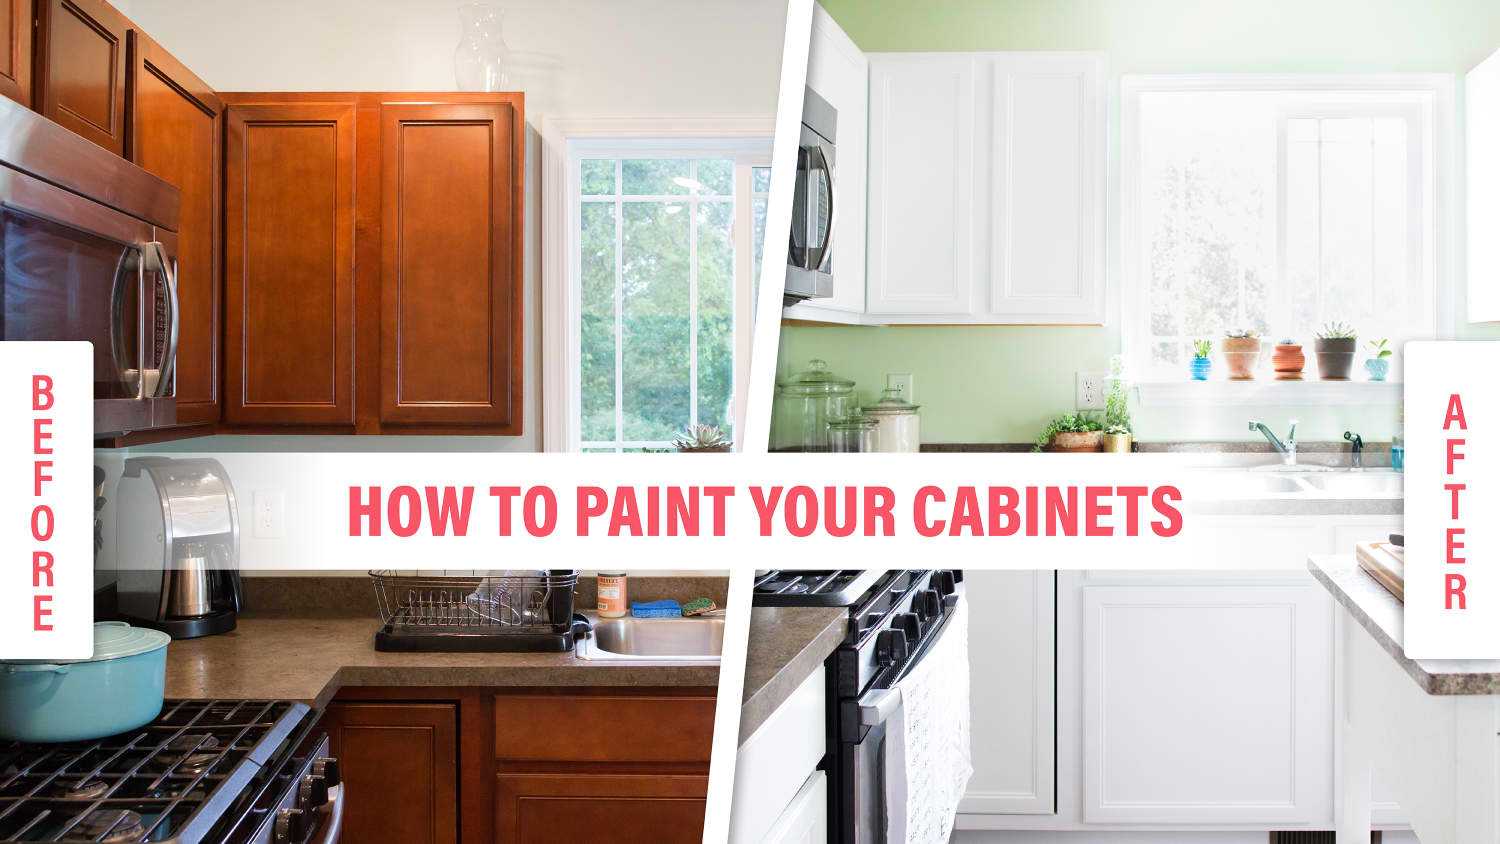
How To Paint Wood Kitchen Cabinets With White Paint Kitchn from cdn.apartmenttherapy.info Use a small piece of painter's tape on the door backs to label their placement; Apply another coat of the stain remover. Next, lightly sand and wipe off the dust with a tack cloth. Let the gel sit for 10 minutes or so until you see that the surface has bubbled and softened. Wipe off the sanding dust with a clean cloth. Apply gel stripper with a paintbrush to one or two cabinet/door sets at a time (any more and the gel will dry out). We love the look of natural wood and do not want to paint them. If you have stubborn black stains left by hardware, apply oxalic acid (available at hardware stores) with a cotton swab (follow manufacturer's directions).
Sand and stain the faces of the cabinets using the same sanding and staining techniques as for the doors.
Choose a stain color that complements your existing decor. Sorry that it's so long but i wanted to make sure i covered as mu. Old finish, stain, or paint needs to be removed before you can add a fresh coat of stain. Use a sanding block and sand only in the direction of the grain. Sand all of the surfaces where you plan to apply stain. When sanding with an orbital sander, always sand with the grain. There are two ways to go about it. Allow the filled areas to dry, then use sandpaper to smooth out the surface of the cabinets. Mask off the interiors with painters' tape for a clean finish and sand only the front surfaces and visible edges of the cabinet face frames. The higher the contrast between the stain and base, the more vintage the look of your cabinet. Apply another coat of the stain remover. Time to stain those ugly oak cabinets! One quart was enough to do our master bathroom and the 2nd small bathroom as well.